9 Aug 2013

More Dryer Felting and Felt Tapestries

Detail from my ultimate project for today's entry


I recently made a small felt wall hanging for one of my sisters on her 50th birthday.  It's had me thinking about felting and making hangings that feature words and symbols instead of pictures.


She's lived a lot since this photo was taken, but hasn't changed so much... I think pictures are forever.
Finished piece measured about 18" x 12"


I love embellishing the felt by needle-felting in handspun yarn and roving.  I attached the photograph on by punching holes around the edges and then needle-felting
 a continuous length of handspun yarn in the holes and into the felt around the edges to look like big stitches.


The symbols I copied out of books of Viking wooden carvings.  I like not only that these are old motifs, but I love the flow of intertwining knots.  Someday I'll do a huge piece with knots all around the border.


I particularly love this symbol, which is 
St. John's cross and represents
happiness (well I guess it wasn't 
St. John's cross to the Vikings! But 
they used it in their art work all the same.)


So after my recent experiment felting in the dryer with Pellon I got to thinking. Since the Pellon disappeared immediately once it got wet, why bother with the Pellon at all?  Why not just unroll a batt, wet it, and throw it in the dryer?  Batts can be so marvellous just on their own, it would be a really fun way to make felt.


So as an experiment, with as little manipulation as possible, I laid out a basic batt of carded wool (didn't want to use a MARVELLOUS batt in case it turned out a disaster) ...


... added some uncarded locks for colour and texture ...


... and tacked it together here and there with a felting needle.  I tried not to do too much tacking and manipulating, because I wanted to see how successful this method could be at its simplest.


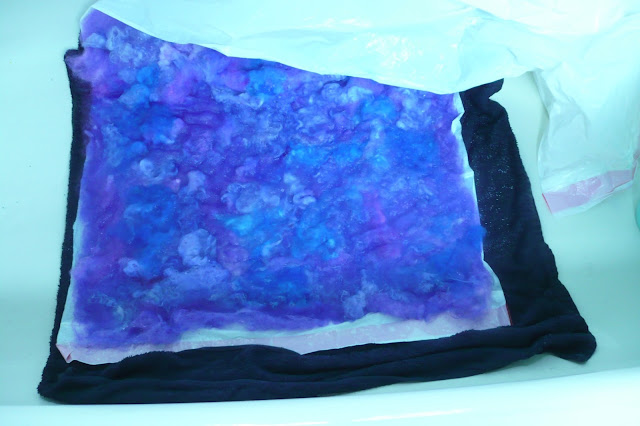
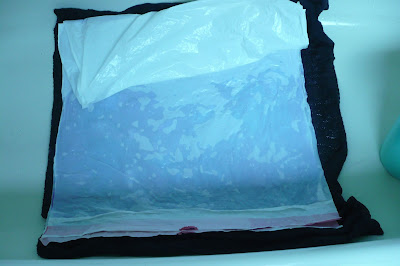
Here it is above, laid out on a cut-open garbage bag on a towel in my tub, after wetting it down with cold water.  Then (below) I folded the garbage bag down over the top.


Rolled it up around a towel


And tied it shut with butcher cord. 


After it was in the dryer (no heat) for 20 minutes or so, I could tell from the edges sticking out that it had felted and was ready to come out.


When I took the piece out, I held it up to the light to see how evenly (or unevenly) it had felted.  I could see that where I had put the ties, the felt was much thinner.


So I decided to do some fulling by hand to tighten the fibres a bit.  I dunked the piece in warm water and threw the piece down onto my felting tray, which is actually a textured boot tray, about 50 times.  I kind of like doing this -- it's not hard work like hand rolling is.


It pulled the piece together, but there are still thin places where the ties were, as well as some other thin places.  I think the other thin places are because I just unrolled the wool batt instead of layering on tufts of wool at right angles, as usually done in wetfelting.  Still a lovely piece of felt.


Here it is dried and ironed


And then embellished by needle-felting on some handspun yarn.  The large spiral is a Viking sun motif, and in the top right-hand corner there is the cross of St. John again, symbolizing happiness.


I like the effect of the multicoloured yarns against the textured background.  I messed up the cross, though, as you can see, one of my over-and-unders should have been an under-and-over...


... but that's all right, especially with the lovely textures of the handspun boucle, which I'm kind of fascinated with spinning right now.


I sewed a simple pocket on the back to hold a hanging rod.


Now I wanted to try to make a piece of dryer felt with no thin spots from string, and no thin spots from the quick and dirty method of just unrolling a batt and felting it as is.


I'd been thinking about making a two-piece hanging for my kitchen wall to feature one of my favourite quotes from M.F.K. Fisher: 
"I still think that one of the pleasantest of all emotions is to know that I, I with my brain and my hands, have nourished my beloved few, that I have concocted a stew or a story, a rarity or a plain dish, to sustain them truly against the hungers of the world.”

So I began with two batts of light turquoise Ile de France wool:


... added at right angles other turquoise-blue rovings and cardings ...


... and finished with some uncarded dyed fleece, tacking it all together with a felting needle.


This time when I rolled it up for felting, I put the roll in a control knee-high stocking and tied it shut.  


It worked perfectly!  No thin spots from ties or roving holes, and the stocking was tight enough that the fibre didn't slide around inside the roll, which I had been afraid of.  

The yarn I used for the text is some leftover handspun I'd made to knit my daughter a hat last winter.  The yarn on the border is Navajo-plied, and because it has such a round three-ply structure, it kept its roundness even after needle felting, which I like.  

I wish I could get these pics to sit side by side in this blog as they will on my kitchen wall, but they just don't want to, so it makes it tricky to read the quote  ...


My kitchen is painted a deep purple, so I'm looking forward to seeing these colours up on the wall.

Here's my St. John's cross again, this time done correctly and laced in a circle, which is also a motif I've found in books on Viking work.


Now on to my next project ... I'm thinking either a coat or a patchwork felt blanket ...


2 Aug 2013

Two Art Yarns (with Grannie Stacks) from One Batt -- Colour Matching

Because I often get different ideas for yarns as I put colours together for a batt, I enjoy carding a few batts with the same colours and then spinning a couple of my ideas to see how they'll turn out and compare.  I can never spin ALL my ideas, but maybe that's a good thing. 

Sometimes it's fun to start a story at the end, so here is what I got from this particular set of batt ideas.  One ply from each of these yarns has been spun from the same multicoloured batt.  I chose different colours for the second ply, creating two completely different looks:


If you look closely, you'll see that each of these yarns has intermittent "grannie stacks,"
or piled-up twists of yarn, throughout.  These add concentrated colour, texture,
and definition to the yarn, and they just make me happy.
I was in the mood for yellow/peach/orange/pink, and I assembled different wools from my dyed stash and combed and carded them up.  This is what I came up with -- I didn't use a whole lot of the darker orange, in the end.  I'm hoping the picture reveals not only the colour differences but suggests the texture differences as well.


Fibre includes Cormo, Corriedale, Mohair, Merino, Romney x Bluefaced Leicester,
Border Leicester x Bluefaced Leicester, Lincoln Longwool,
and a bit of BLFxSilk top that I had leftover from another project
All spun up into my first single, it came together something like this:


Naturally, and true to my general way of doing things, I next forgot to photograph my lovely assembly of purples from which I spun another single to ply with the first.  And a "single" or "singles," dear non-spinning friends,  is one single strand of yarn made from twisted together fibres as is, without wrapping anything around it, just on its own.  For this yarn, I'm taking two singles and twisting them together, or "plying" them, to make a two-ply yarn.

I did manage to remember to take a photo of me making the second single, though, and you can get some idea of the different purples that went into it from the carded batt I'm spinning from -- well maybe if you enlargen the pic by clicking on it.


Here are the two singles before plying.


This yarn -- my inspiration for the two yarns I'm talking
about now -- is from a previous blog entry,  
HERE
and you can find it in my Etsy shop HERE


What I decided to do was spin two-ply yarn with beehive grannie stacks, similar to the yarn on the right, but instead of those long even coils of colour, there would be stacked-up coils, and instead of using the multicoloured single for the stacks, I'd use the solid-coloured one.


So here I am plying the two singles, or twisting them together (in the opposite direction to that in which they were first spun).  I hold the two singles tautishly out ... 


... and then slide my hand up, allowing the wheel to twist them together.


After every three lengths of regular plying, I put in a grannie stack.  This is wrapping one ply (in this case, the purple one) around the other in the same small area, creating a little stack, and then continuing to ply normally.  So here I'm getting ready to make my stack, holding the purple single out to the side ...


... then I let the wheel spin it around in the same spot, angling my purple ply up and down a bit to spread out and stack the yarn.  I'm holding the other single way back with my other hand, because as I twist and wrap the purple single around the other single, the other single is untwisting, and if it untwists too much it will pull apart.  By holding it further back, I'm distributing the "untwist" over a greater length of yarn.


When I'm happy with my little grannie stack, I continue plying normally.  


Here it is on my spindle


My high-tech lazy kate is there on the floor.  A lazy kate is a contraption that holds your spindles
full of yarn and allows you to unwind them as you ply.  There are some
very gorgeous ones out there that you can buy.  This one is made from a cardboard box
with a couple knitting needles punched through the walls.  My spindles fit perfectly
on the needles.  The biggest trick is remembering WHERE the needles are when you want
to knit something with them.

And all finished.  The little stacks will make little purple shouts of colour in whatever it's used for.


You can see this in my Etsy shop HERE

For the second skein, I wanted to ply with yellows.  I used the same yellows that were in the multicoloured single - here they are again:


Carded into a batt and spun in the same way as the other yarn, this time with yellow grannie stacks, it came out like this:


This is also in my Etsy shop HERE


Changing the colour of the second single really makes a big difference in the overall look of the yarn.  If I'd had enough of those multicoloured batts, I would have plied another skein with peach/orange, and yet another with pinks.  Ah, so much to do, so little time...


Check it out in my Etsy shop


Check it out in my Etsy shop