Showing posts with label tapestries. Show all posts

9 Aug 2013

More Dryer Felting and Felt Tapestries

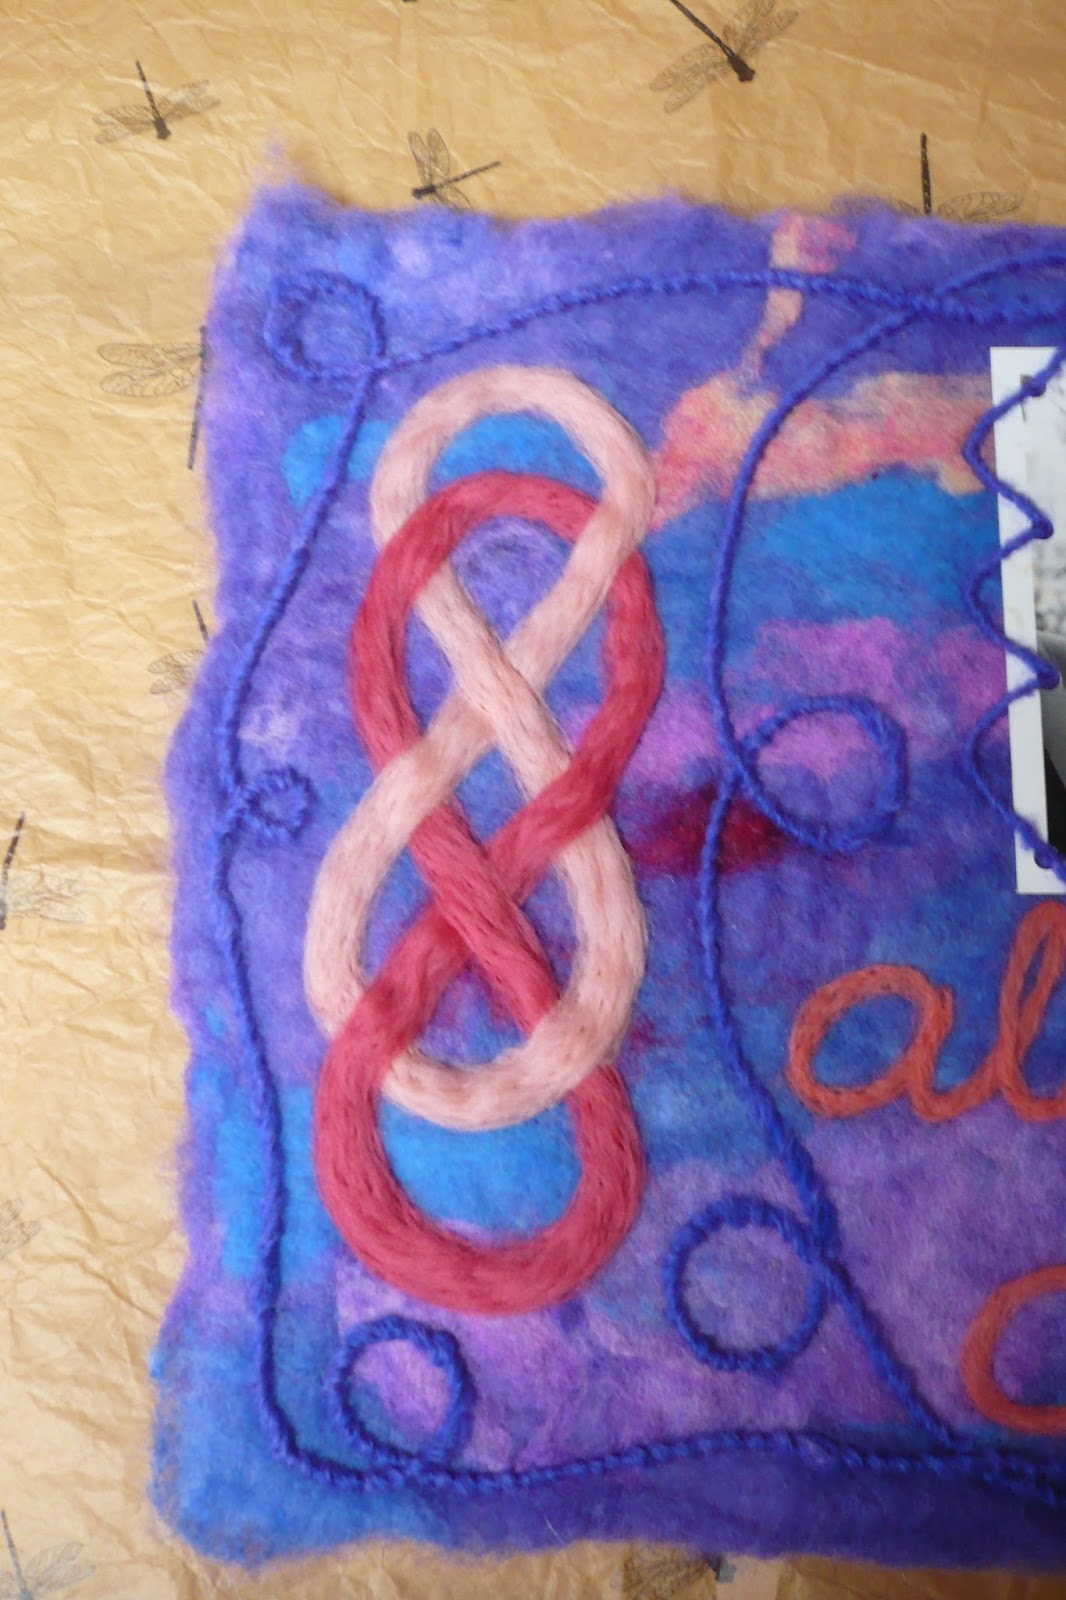
Detail from my ultimate project for today's entry


I recently made a small felt wall hanging for one of my sisters on her 50th birthday.  It's had me thinking about felting and making hangings that feature words and symbols instead of pictures.


She's lived a lot since this photo was taken, but hasn't changed so much... I think pictures are forever.
Finished piece measured about 18" x 12"


I love embellishing the felt by needle-felting in handspun yarn and roving.  I attached the photograph on by punching holes around the edges and then needle-felting
 a continuous length of handspun yarn in the holes and into the felt around the edges to look like big stitches.


The symbols I copied out of books of Viking wooden carvings.  I like not only that these are old motifs, but I love the flow of intertwining knots.  Someday I'll do a huge piece with knots all around the border.


I particularly love this symbol, which is 
St. John's cross and represents
happiness (well I guess it wasn't 
St. John's cross to the Vikings! But 
they used it in their art work all the same.)


So after my recent experiment felting in the dryer with Pellon I got to thinking. Since the Pellon disappeared immediately once it got wet, why bother with the Pellon at all?  Why not just unroll a batt, wet it, and throw it in the dryer?  Batts can be so marvellous just on their own, it would be a really fun way to make felt.


So as an experiment, with as little manipulation as possible, I laid out a basic batt of carded wool (didn't want to use a MARVELLOUS batt in case it turned out a disaster) ...


... added some uncarded locks for colour and texture ...


... and tacked it together here and there with a felting needle.  I tried not to do too much tacking and manipulating, because I wanted to see how successful this method could be at its simplest.
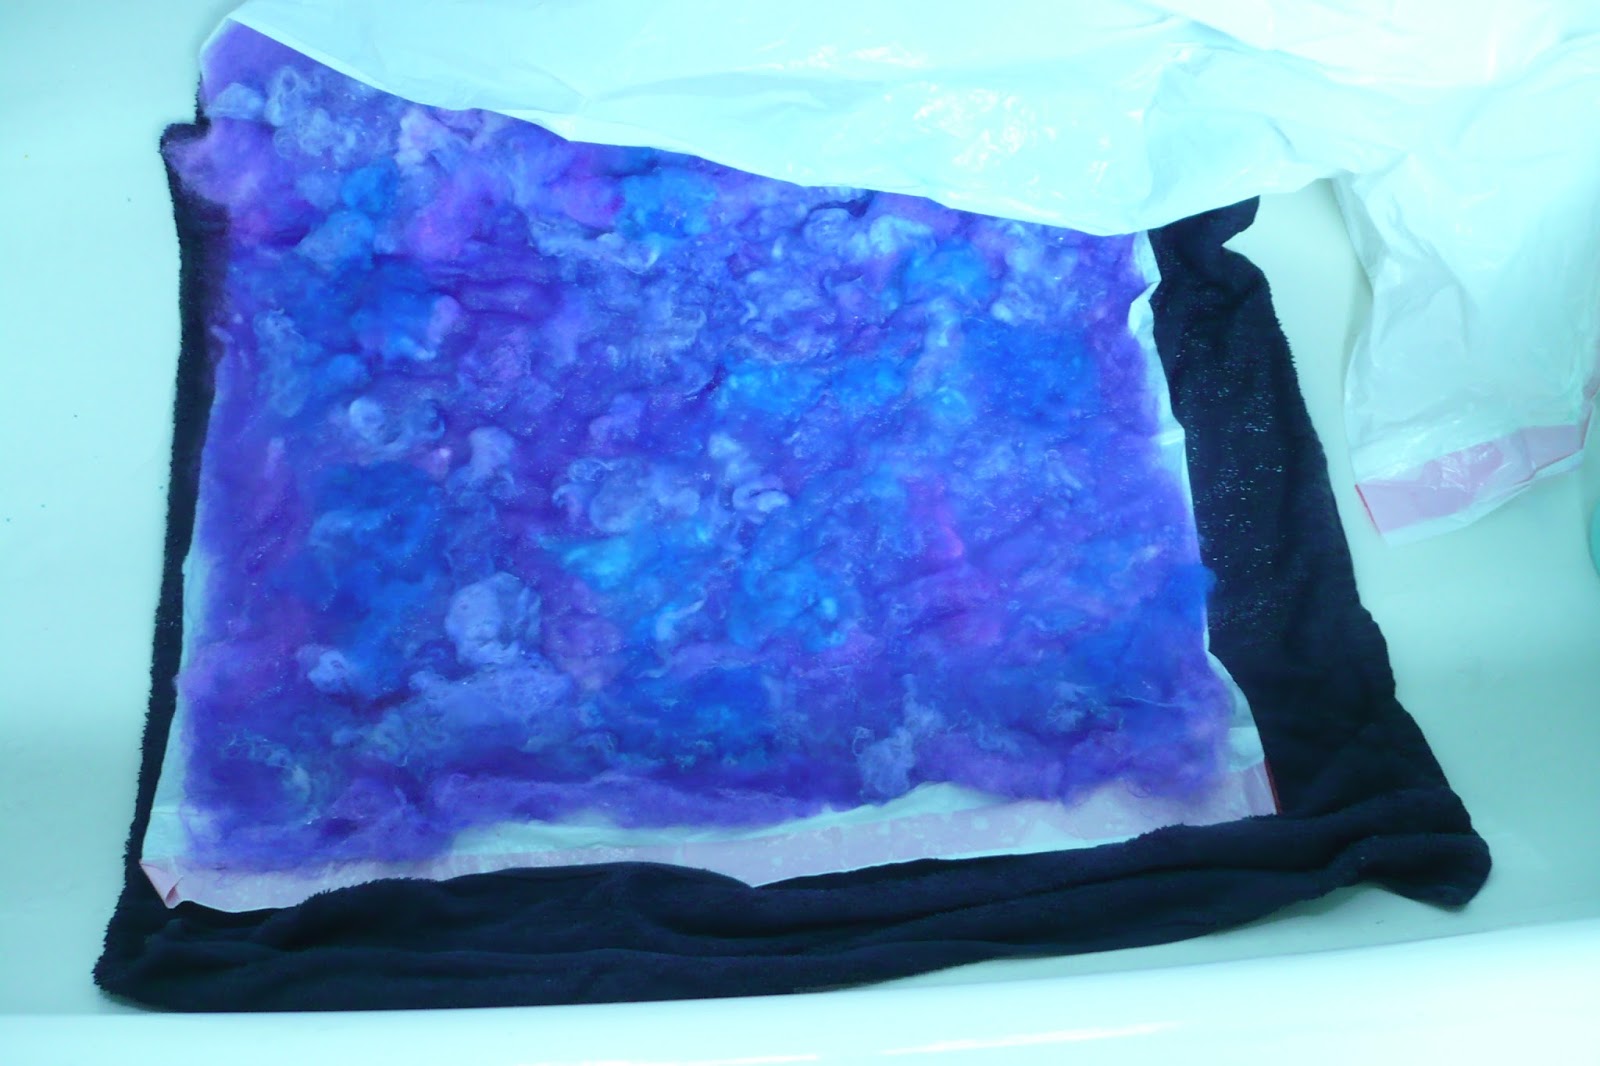

Here it is above, laid out on a cut-open garbage bag on a towel in my tub, after wetting it down with cold water.  Then (below) I folded the garbage bag down over the top.
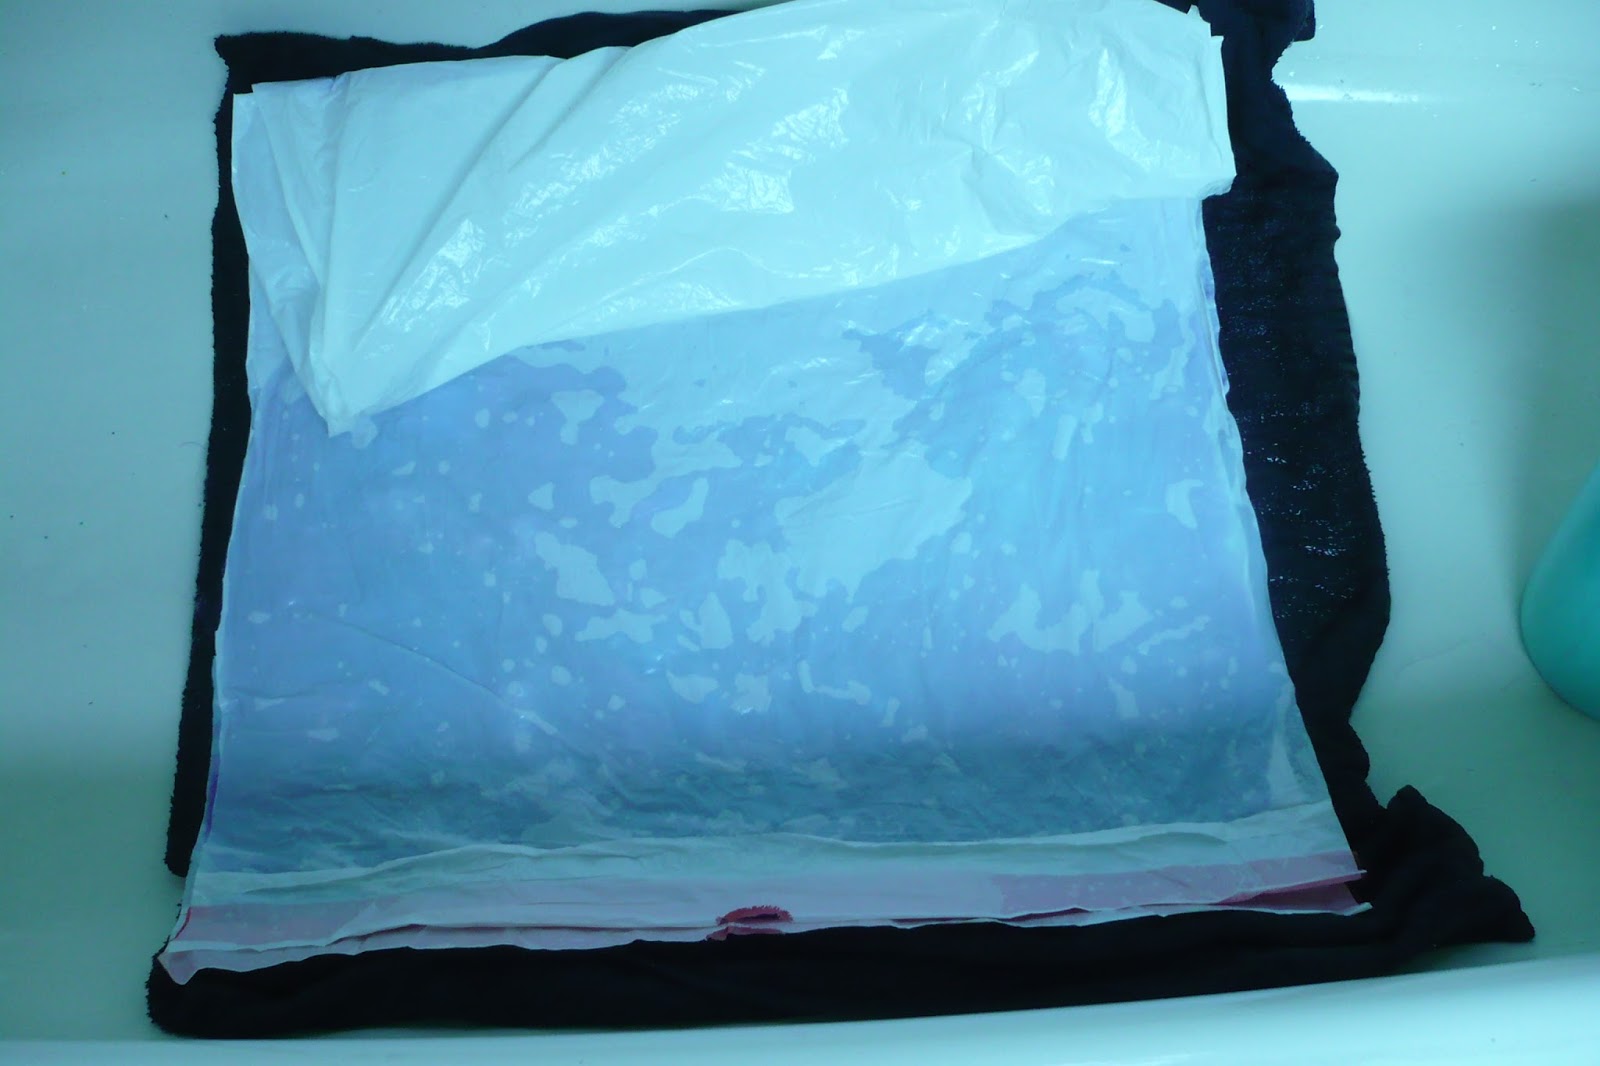


Rolled it up around a towel


And tied it shut with butcher cord. 


After it was in the dryer (no heat) for 20 minutes or so, I could tell from the edges sticking out that it had felted and was ready to come out.


When I took the piece out, I held it up to the light to see how evenly (or unevenly) it had felted.  I could see that where I had put the ties, the felt was much thinner.


So I decided to do some fulling by hand to tighten the fibres a bit.  I dunked the piece in warm water and threw the piece down onto my felting tray, which is actually a textured boot tray, about 50 times.  I kind of like doing this -- it's not hard work like hand rolling is.


It pulled the piece together, but there are still thin places where the ties were, as well as some other thin places.  I think the other thin places are because I just unrolled the wool batt instead of layering on tufts of wool at right angles, as usually done in wetfelting.  Still a lovely piece of felt.


Here it is dried and ironed


And then embellished by needle-felting on some handspun yarn.  The large spiral is a Viking sun motif, and in the top right-hand corner there is the cross of St. John again, symbolizing happiness.


I like the effect of the multicoloured yarns against the textured background.  I messed up the cross, though, as you can see, one of my over-and-unders should have been an under-and-over...


... but that's all right, especially with the lovely textures of the handspun boucle, which I'm kind of fascinated with spinning right now.


I sewed a simple pocket on the back to hold a hanging rod.


Now I wanted to try to make a piece of dryer felt with no thin spots from string, and no thin spots from the quick and dirty method of just unrolling a batt and felting it as is.


I'd been thinking about making a two-piece hanging for my kitchen wall to feature one of my favourite quotes from M.F.K. Fisher: 
"I still think that one of the pleasantest of all emotions is to know that I, I with my brain and my hands, have nourished my beloved few, that I have concocted a stew or a story, a rarity or a plain dish, to sustain them truly against the hungers of the world.”

So I began with two batts of light turquoise Ile de France wool:


... added at right angles other turquoise-blue rovings and cardings ...


... and finished with some uncarded dyed fleece, tacking it all together with a felting needle.


This time when I rolled it up for felting, I put the roll in a control knee-high stocking and tied it shut.  


It worked perfectly!  No thin spots from ties or roving holes, and the stocking was tight enough that the fibre didn't slide around inside the roll, which I had been afraid of.  

The yarn I used for the text is some leftover handspun I'd made to knit my daughter a hat last winter.  The yarn on the border is Navajo-plied, and because it has such a round three-ply structure, it kept its roundness even after needle felting, which I like.  

I wish I could get these pics to sit side by side in this blog as they will on my kitchen wall, but they just don't want to, so it makes it tricky to read the quote  ...


My kitchen is painted a deep purple, so I'm looking forward to seeing these colours up on the wall.

Here's my St. John's cross again, this time done correctly and laced in a circle, which is also a motif I've found in books on Viking work.


Now on to my next project ... I'm thinking either a coat or a patchwork felt blanket ...


29 Jul 2013

Dryer Felting - New to Me and Way Easy on the Arms

I love handmade felt.  I love the colour possibilities and vagaries of intertwining strands of hand-dyed fleece.  I love needle-felted embellishments.


But the actual process of wet felting is arduous for me and I seem to have enough aches and pains as it is without leaning over a countertop and rolling (and rolling and rolling) wool into felt for half an hour.  So I was very excited to come across this artfelting tutorial by Karin Skacel on a Knitting Daily episode on YouTube.  In the tutorial, they use some special paper to hold the wool roving in place before rolling it up and throwing it in the dryer.  After the roll is felted, they pour on boiling water to dissolve the backing paper.  She notes that it can leave a sticky residue but you should be able to rub most of it off.  While I was very interested to try this easier-on-the-arms-and-back felting method, the words "sticky residue" and "wool felt" juxtaposed so casually give me the creeping heebie jeebies, so I cast about for an alternative to the backing paper.

I decided to try Pellon Wash-n-Gone water soluble fabric stabilizer.  What's the worst that could happen, after all?  A big soggy mess plastered inside my dryer, time spent, a lesson learned.  Pshaw, says I.  Getting my hands on a 50 x 50 cm square (19 x 19") piece to experiment with, I embarked on this felting expedition. 

First step on the tutorial is spreading a wool batt out on the fabric stabilizer, which is a lot like fabric and therefore I think it would be nicer to use than paper anyway.


I dyed this white and grey fleece red and it came out this lovely darkish red colour
On the tutorial, it says you only have to tack the roving in place here and there with a felting needle just to keep it from sliding around.  I limited myself to minimal tacking because I really wanted to check out this method as described, to see if it really is that easy.  I felt like doing a lot more tacking but you'll be happy to learn I remained strong and resisted the temptation.  I did not do the criss-cross of roving that you usually do when wet felting; I just laid out the batt and tacked it in place.


Here's an action shot of some hands-free tacking


After the batt was in place, I raided my big bag of wool gatherings that I've cleaned off my drumcarder and my combs and added more colour, tacking these bits in place as well.


Proper action shot to keep you riveted


When I was done it was pretty lumpy and bumpy.


Then I added some yarn I had spun.  I was interested to see how well this felting process would incorporate something that distinct into the piece. 


Again, I tacked it in place with the needle, using a bit more care with the yarn than I did with the batt and roving.  It's still pretty loosely in place, though.


Next I forgot to take pictures for the following sequence so this is a RE-ENACTMENT.  I laid a wet towel in the bottom of my laundry/crafting tub (I'm lucky enough to have a waist-high bathtub as a laundry tub -- long story somewhat revealed in this blog entry.).  On this I set my felt-to-be, and I carefully poured cold water all over it, making sure it was all soaked through, but also making sure I didn't mess up my design.  Yes, I said cold water, and no, there's no soap in it. Then I laid a piece of plastic on top.


This is a cut-up garbage bag which is exactly as wide as my piece.  I wished it had been wider, because edges of my felt (remember I have yarn all along the edges) were kind of sticking out.  I envisioned the yarn sliding out and just felting to itself in a big mess.  If you're the kind of person to get anxious ahead of time over negative foreshadowing, allow me to set your mind at ease -- nothing bad happened because of my shade-too-narrow plastic bag. It is something to keep in mind for future activities, though.


Now you need a centre core around which to roll up the wool.  I used a rolled wet towel placed at one end. I don't know why I wet it - it made everything much heavier.  This might have made for a more vigorous thwapping around inside the dryer, but next time I may try a dry towel and see if there's any difference.


When I got to this stage, I noticed that the fabric backing already seemed  to have dissolved in the water.  Yikes!  But it was okay.  I kept rolling and everything held together.


The piece of plastic has to be long enough to continue wrapping around the outside until the entire piece is wrapped in plastic. 

Now the re-enactment is over and we're back to the actual wet stage of felting inside the craft tub.

Here's my wet parcel laid out in the bottom of the tub


I tied it tightly with butcher cotton in several places.  In the tutorial, she slides the roll into a leg of pantyhose instead of using string.  But pantyhose is one of those things I gleefully gave up many years ago so I don't have any kicking around the house.  Plus given that my piece is so much larger (and heavier) than the one in the tutorial, I worried the hose wouldn't hold it together well enough.  She suggests elastic bands as an alternative, but I went with string.

Note that there's an inch and a half or so of  wool beyond the outer ties - I was worried
that those edges would be lost as the wool slid out of the plastic in the dryer


This wet bundle went in the dryer for 20 minutes with no heat.  I checked it by sticking my fingers inside and seeing if they encountered loose roving or solid-feeling felt.  It kind of seemed fine, but I decided to put it back in for another 10 minutes.  When it came out I unrolled it carefully -- it was still completely soaking wet, of course -- and to my joy and delight it had felted perfectly!   

You can see it did shrink a bit, as it started out just as wide as the plastic.

Here's the back side, a nice solid piece of felt.  You can see the four ridges where the strings were tied around the bundle.  Held up to the light, the felt doesn't seem much thinner here, and they ironed out fine.  I might experiment with elastic, though, or even stockings to see if I can get rid of these ridges while still keeping the wool more or less in place during the thumping dryer-felting process.  All said, this is definitely the easiest piece of felt I've ever made.


I ironed it a bit on the back to smooth out some of the wrinkles from where the ties were.  Even the squiggly yarn going around the edges had felted really well into place.  There were only a few places where it needed fixing with a felting needle.


Then I needle-felted in some surface texture.


And added a much-loved quotation from Mary Randolph Carter that always makes me feel better when a certain aspect of my life gets me down.


It's crucial to keep the important part in mind, right? So leave the tidying for another day!


Create!

28 Jul 2013

Framing Tapestries or Lucky to have a Folk Artist Sister

I do love weaving tapestries, although it's awhile since I've indulged in that particular pleasure.  I wanted to share a great framing idea for small pieces -- anything lightweight enough not to sag between the hangers -- as well as my "usual" method for larger hangings.

I'd been experimenting with incorporating only certain warp threads into the weft, and letting others float above the weaving to add colour and texture to the image.


Fish tapestry, 16.5 cm x 11.5 cm (6 1/2" x  4 1/2")
Every second warp thread is left loose to float above.  I used a piece of paper to separate
the warp threads, flipped the loom over and wove the background from the back.
Then I flipped the loom over again to weave the fish into the floating warp threads,
and with a bundle of metallic threads did some free-form weaving to gather
the loose warp threads and give it a wavy, watery look.  The little purple guys were too small 

to hold their shape.  If you get far enough away and squint, they look fish-ish -- now I think of them 
as floating blurbles and have made peace with them.


Dragon tapestry, 18 cm x 10 cm (7" x 4")
I alternated green boucle and blue warp threads, weaving the blue into the bottom half
of the tapestry and letting the green float, and vice versa for the top half, using paper to keep
the threads separate, as for the fish.  The border edges weave in all the warp threads.
The tree is woven into the floating warp threads, and the dragon is embroidered
into the whole piece.


Here's another look at my fishie and dragon:


The dragon is the avatar I use for my Etsy shop

But how to hang these little guys?  I didn't want a permanent frame, because life is too rife with unforeseen circumstances to gamble so flagrantly, so no gluing or anything like that.  They're only small and lightweight, and I didn't want them to disappear on the wall by hanging them the usual way. 

And what's the usual way? you may ask.  Simple but effective: sew the fuzzy side of a length of velcro across the top of your tapestry.  Staple the sharp toothy side onto a length of narrow wood.


Sewing the velcro onto the tapestry can be hard on your fingers - it's tough to make
the needle go through that heavy velcro material.  However, I do not suggest
using stick-on velcro as an alternative.  The glue just isn't strong enough,
unless you have a very light-weight tapestry. And even so, I don't think it lasts long enough.

I guess you could machine-sew it onto the backing fabric before you sew it onto the
tapestry, but you'd have to be pretty exact in your measurements, as well as have the forethought
to do that bit first, which thus far in my life I guess I haven't...


Screw hanging loops into the top edge of the wood, and hey, presto! A perfectly hung tapestry - or at least a tapestry ready to be perfectly hung.


If the hanger is exactly as wide as your tapestry, there won't be any sag

I learned to do this from my tapestry instructor, many, many a year ago now, given away by the year I have stitched onto the back.  And the example I'm showing you is my first ever tapestry, woven in that very class.  Here it is from the front:


Troll in the Moonlight - my first weaving endeavour 46 cm x 43 cm (18" x 17")
I was inspired by Faroese folktales in choosing my subject.


I loved making this; it totally turned me onto weaving. Here he is close up, gazing pensively at the rising moon ...


The entire piece is woven, except I top-stitched on the black outline of the troll.
We learned yarn dyeing in that class as well, and I wove the sky out of yarns we dyed ourselves.


But back to the issue at hand.  My dragon and fish tapestries are much smaller than my troll, and I wanted an actual frame to help them stand out when they were hung.  This would save my fingertips from sewing on velcro, but still, what to do?  

Luckily, I happened to mention this quandary to my sister Kathi, who is a folk artist (Pufferbellies) and good with wood.  She made two great frames that are perfect - although admittedly you have to have some woodworking tools to make them just the way she did.


Each frame measures 29 cm x 24.5 cm (11 1/2" x 9 1/2"),
the centre area where the tapestry is mounted is recessed about 1/2 cm (1/4").

I love the way she painted the frames with layers of colours,
and the contrasting recessed centre that shows up the piece

They're two separate pieces of wood, the 1.5 cm-thick outer frame, and a thin piece of plywood mounted in the centre like a photograph in a frame.  


Aha, a secret glimpse of my high-tech homemade cardboard lightbox...

The tapestries are actually tied onto the recessed centre piece of plywood.  This is why I don't think it would work with heavier tapestries, because you would risk it sagging between the ties, or even being too heavy for the plywood to hold, depending on the size of the piece.


She drilled holes in the plywood to tie on the tapestries, which I did with strong upholstery thread.

Here they are from the back:


The plywood is held in place using those metal tabs used in photo frames.
With no woodworking skills or no access to tools, however, you could do something
simpler, just using the thin painted plywood and tying your piece onto the centre,
and then creating your own outer frame (out of felt, or woven pieces, or paper, or
more painted plywood) and gluing it onto the plywood around the piece.
Something quick and dirty would be to just buy a photo frame, punch holes 

in the cardboard backer, and sew the tapestry onto that.  You've lost
the handmade aspect of the frame, but sometimes you do what you have to, right?

Painting the back of her work is just one of those touches Kathi likes to add, and which I love.
The knot is just a reef knot so it's easy to untie if I ever need to.
And just for fun, here are some other tapestries I made a few years ago.  

This was my first experiment with floating warps, where I incorporated a frame into the picture - taken pre-lightbox, unfortunately, so the colours are all bleached and the picture quality is kind of lousy.  I gave the tapestry away so I can't re-photograph it...

The fish was woven with sari-silk yarn.
As I recollect, the piece measures about 25 cm x 25 cm (10" x 10")

And a couple other weaving experiments, also photographed sans lightbox some time ago ...


Pilot whales frolicking around the Faroe Islands - this was 40 cm x 40 cm (14" x 14")
Again, playing with incorporating the frame into the piece.

Fog creeping to a standing stone - the ground is sari-silk yarn, 40 cm x 15 cm (14" x 6")