15 Aug 2014

How Far Would You Go for a Fleece?

This was originally an article I wrote for a spring 2014 edition of the Ottawa Valley Spinners' and Weavers' Guild newsletter

I began spinning some six or seven years ago ... I think.  Time has come to do weird things in my mind these last years.  My life seems to have divided itself into three chunks: before I had kids, after I had kids, and when I was a kid myself -- not necessarily in that order, and the most recent chunk is the one of which my recollections seem the least clear.  But learning to spin came after I had kids.  And as time passes and I find out more and more about spinning and how much there is to it that I don't yet know, I kind of feel more and more like a beginner and less and less like I have any idea what I'm really doing, apart from the fact that I'm having a good time.

One of my very first skeins of yarn - alpaca with banana fibre


And like many spinners wending their way through this particular corner of the world, I have found that I really and truly enjoy the whole process, taking the fleece right from the sheep (well, right from the farmer who has taken it from the sheep) and going through the whole washing, dyeing, combing, spinning she-bang.  That's really the attraction, more so than the finished product.  People ask, "And what will you do with this when you're done?" and I have no sweet idea.  Okay, sometimes I do.  But generally that is never the point.  Give it, sell it, weave it, knit it, add it to my collection of handspun yarns that some day I'll do something with -- whatever.  I'm not someone who plans ahead.  I spin to enjoy the moment.  Here I am, the wool is in my hands, could life get better than this?  To others be the dry contemplation of the future.

Experimenting with solar dyeing - after spending a hot day on our sunny back porch wrapped in black garbage bags, the wool came out beautifully dyed
My discovery that there are many ropes to learn in the fleece-buying world will be news to no one.  Like everyone else, I've spent a lot of time looking in all the usual places for raw fleece I want to work with -- something that's not too harsh and not too short and not so awfully vm-y that it will make me cry.  It's nice to buy local; it's nice to buy cheap.  I've bought from near and I've bought from far, online and in person, and my children and husband are getting used to weekend drives involving stopping off at a farm somewhere and meeting the sheepies.  And I've made a lot of terrible fleece mistakes.  (Ah, the stories I could tell...) As I said, I'm still learning and I have far to go. 

Drying fleece along with the laundry - a purple day


Some years ago I came across Rupperts' Corriedales in Pennsylvania.  They've cross-bred their Corries with Australian Corries and they coat some of their flock for sale to handspinners.  They don't post pictures of their fleece online as some farms do, but you can write in and get on their waiting list and they'll send you a description of what's available when they shear.  Maybe three or four years ago I bought my first smallish fleece from them.  It was beautiful -- lovely long staple, on the soft side, and so clean and marvellous to work with.  It was my first coated fleece -- and you never forget your first coated fleece.  But that box of fleece got a major ding in custom service charges crossing the border, holy smokes.   Not custom charges, not GST, it was just a service for transporting it through customs.  Ouch.  Two years later, I bought two more fleeces from them, a Corriedale and a Cormo-cross, and this time they tried mailing it differently in hopes of missing the custom service charge -- no luck, again a major extra expense.  So even though those fleeces were amazing, even though they brought nothing but joy to my life, I had to come to terms with reality and I promised myself:  never again.  "Never again," I told my husband.  "Never again," I said to the Rupperts' Corriedales website.  "Never again," I told my empty bag of Corriedale fleece.  I just can't afford being fleeced for fleece.  Plus, I have a ton of fleece now.  A ton.  What do I need with more fleece -- even if it's irresistably beautiful and brings joy to my life?

Raw Cormo fleece from Rupperts' Corriedales - so clean and beautiful it hardly looks lived in

Then early this spring I got an email from the Rupperts telling me they'd done their shearing and I was at the top of their waiting list and had my pick of the crop.  Inexplicable surprise.  How did that happen?  There was only one explanation:  the fleece fairy had struck again!  I knew it was a sign from the Spinning Powers that Be, and one that shouldn't be ignored.  It's just not wise.  So I went and explained to my husband about the fleece fairy, and suggested it was probably his idea that we could drive down and bring back the fleece ourselves rather than pay that ridiculous custom service charge, and wasn't he clever to think of it in the first place. He agreed (he is a clever guy, that's why I married him), and Easter weekend we drove down to pick up the two fleeces I'd chosen from my glorious position at the top of the waiting list: one Corriedale ram and one Cormo ewe.

Equally clean and beautiful raw Corriedale fleece from Rupperts' -- such a contrast in character from the Cormo

The farm is just outside Gettysburg, so to make it seem more like a family weekend road trip and less like spending a long weekend going to a farm really far away so Mum could satisfy her bizarre wool addiction, we decided to drive direct to the farm on Friday, meet the family, love the sheep, get the fleece.  Then Saturday morning would be an educationally satisfying exploration of Gettysburg, and Sunday a visually stimulating scenic drive up through the Adirondack mountains.


Washed Corriedale locks - it doesn't come out well in the pictures, but these locks are more lustrous than the Cormo, and although they're wonderfully soft for Corriedale wool, Cormo is especially super-soft

Washed Cormo locks - soooooo soft and fluffy


Alas.  Although we'd counted on a certain delay crossing the border, we had no idea it would take so long just to get through the toll booth to cross the bridge to get to the border.  ("What, you don't have sheep in Canada?" asked the border official.)  We didn't arrive in G'burg until 8 pm, after dark.  It wasn't an unpleasant entrance: the main street is all quaint historic buildings and lined with pear trees which happened to be in full majestic blossom, lit by old-fashioned street lamps, so we had a spectacular drive around town.  But the kids were tired and wanted to stay at the hotel, claiming they'd seen enough sheep farms for one lifetime, anyways.  (Ha!  dream on, my pretties.)  So my husband and I bravely set off in the dark and picked our way through complicated country roads with few road signs and no lighting to speak of and somehow managed to find the farm.  Clearly, the fleece fairy was still smiling kindly down on the expedition.  Didn't meet the sheep -- didn't even meet most of the family because they'd had to go out -- but there were my fleeces, all bagged up and ready to go.  Mummy's here, my darlings!


Combed top ready to spin - Cormo (left) and Corriedale (right)
You can kind of see that the Corriedale top is shinier than the Cormo


And the rest of the trip?  Well, it happened.  And whatever was going past our car windows on the outside, inside my brain was the constant refrain, "Beautiful fleece, all mine, all mine!  Beautiful fleece, all mine!" And then at some point we arrived home again.


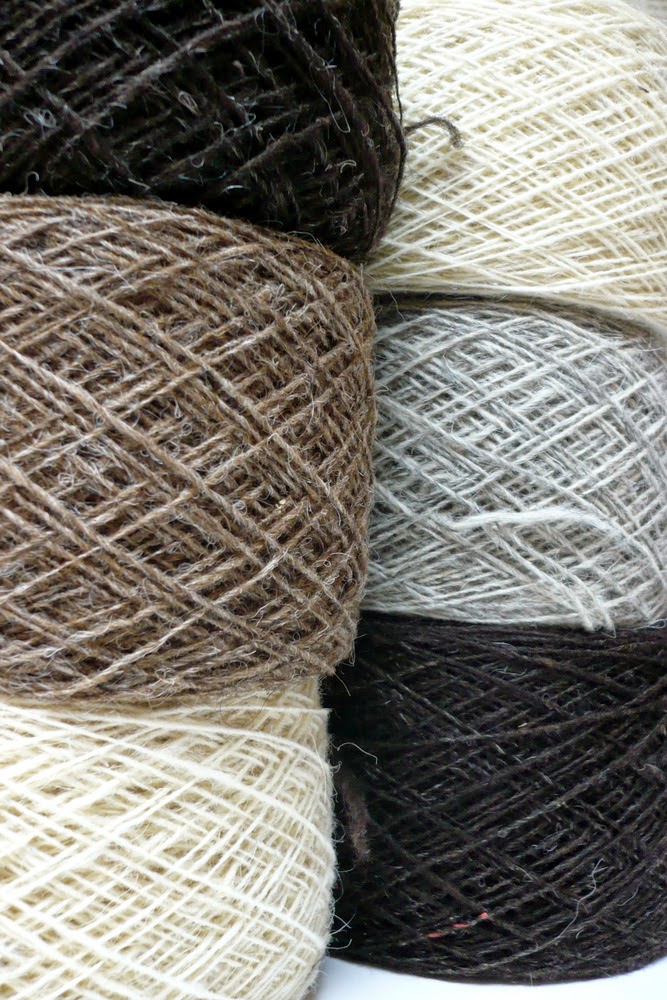
Spun and triple-plied - Cormo (soft and stretchy) on top, and Corriedale (soft and lustrous) on the bottom

11 Aug 2014

Weaving with Faroese Wool: An unfinished blanket story

Something else I've been keeping busy with this past year is a project I've been meaning to get around to for a long, long time.  Some years ago on a trip to the Faroes I bought several skeins of very fine-weight Faroese wool singles (unplied wool, 6,000 m/kg).  It's spun in the natural colours of the sheep, and they leave in a fair bit of lanolin so the skeined yarn is kind of stiff-ish.  I'd bought yarn there in the past for a sweater, and when I got it from the store the white yarn was almost yellow and it felt -- well, it felt and smelled very lanoliny.  Not a bad smell -- actually, I like it -- but not generally what you expect from store-bought yarn.  It was easy to work with, however, and once my sweater was finished and washed the wool was snowy white, beautiful, and oh so warm.

Spools of Faroese yarn against the border of my blanket
I wanted to do something different this time, though, something woven and blanketish, so I got the superfine singles instead of heavier sweater yarn. I thought the extra lanolin would make the yarn really easy to work with on the loom. And aren't these colours amazing?  Speaking as someone who loves dyeing wool and coming up with new kinds of purple, I have to say I am mesmerized by the natural beauty of these browns and greys and how they look together.


The yarn company is called Sirri. Here's their label:


It's impossible not to notice in the Faroes that the people there are very connected to their land and their history.  It's one way they have managed to continue to preserve their language and culture, which in these days of Internet connectedness and general homogenization would be so easy to lose.  I can't help thinking this pride in their heritage is evident right in the yarn label, which itself is very (to me) charming, printed in brown ink on light brown handmade-looking paper.


And I love the nostalgic poem on the back - I wish I could understand the Faroese; it's probably better than the English translation.


So back to the wool.  Standing in the store hovering over the bins of yarn, I didn't have a plan in mind.  I just saw yarn I loved and wanted to have and use, with no possibility of going away, thinking a project through, and returning later to make a purchase.  So I just got several white skeins and then one or two each of the other colours and left the planning until later.  


When I got home and turned my mind to it, however, and really checked out the yarn, I found that it wasn't going to make a good warp.  A basic warp strength test is to take a length of yarn and give it a yank to see if it holds together.  This yarn pulled apart easily.  Really easily.  It was kind of devastating, because I had my heart set on weaving with it.


Something else I had to come to terms with was the fact that it really wasn't very soft.  In fact the opposite; it's pretty scritchy.  In this close-up below of the strands of yarn -- the four on the right are my Faroese wool -- you can see how they might not be entirely soft, with those thick strands of wool sticking out.  Some of the Faroese yarn wasn't very evenly spun, as well -- which is okay, much of my weaving and spinning involve yarns that aren't evenly spun.  It gives an effect to the finished work that I really like.  Still, in some places it got really very thin, and I knew I'd have to do some finagling to keep the yarn intact in the weaving, lest the structural integrity of the fabric be compromised.

Yarn on the left - Alpaca/Silk 2/14 yarn from Maurice Brassard - the warp
Four yarns on the right - my beautiful Faroese yarns - the weft
So I was going to need a warp, and I wanted something about the same thickness as the other yarns, but much stronger and hopefully much softer to offset the scritchiness of the coarser Faroese wool.  I chose this Alpaca-Silk yarn from Maurice Brassard.  I hoped it would show off the colours of the weft nicely - although more subtly with the white.


The chosen warp -- the "white" Faroese yarn looks creamy yellow in comparison, because of the lanolin left in the wool

I'd decided to weave a twill pattern both for a nice hang to the fabric, and because there are so many patterns to choose from that would allow a colour contrast between weft and warp threads.  Because of the width of my loom (45") I was going to weave the blanket in panels and sew them together.  Rather than trying to match stripes of weft colour changes in the panels, I decided to plan "random" stripes of solid colour that wouldn't align. As I looked at patterns I became fascinated with trying an undulating twill -- which, as the name suggests, is a twill with a wavy effect in the pattern.  In the end I chose one from Anne Dixon's Handweaver's Pattern Directory, on p. 199, changing the treadling with each colour change.  I sett the 2/14 warp yarn at 15 epi for a light, airy fabric.


At each end of the panels I wove a stripe with the warp yarn.  You can still see the pattern, even white-on-white.  Because the fabric on the loom is under tension, there are holey gaps.  Once it's off the loom and washed, those holes mostly disappear or at least get considerably smaller as the threads come together and form a piece of cloth.


Off the loom and washed

It wove up fast and as always it was a joy to see the pattern reveal itself in the contemplative back and forthing of the shuttles.  I love the way the undulating pattern gives a depth to the fabric.  I'll definitely be exploring undulating twills in future projects.  There are some really nice ones in Helene Bress's The Weaving Book.


Unfortunately, the white Faroese wool wound up washing so white after I got it off the loom that there's very little contrast with the warp.  Still, you can see the pattern, and the fabric is really light and airy just as I'd hoped.  It will be a lightweight but warm blanket.  In places where the weft yarn was spun really uneven and got too thin for comfort, I broke off the yarn, cut out the thin part, then picked up where I left off.  I probably had to do that 10 or 12 times altogether, but only with the dark brown wool, so I wonder if it was just a bad batch or something.


Close up you can see what makes the undulating pattern: the warp threads are sometimes grouped or repeated in twos and threes through the same shaft, instead of changing shaft with each thread.  In those places the angle of the pattern lines made by the weft changes to a more gradual slope, giving a wavy effect.


Because of a really ridiculous math mistake in calculating how much weft yarn I had, there's loads and loads of yarn left over.  I can easily weave two more panels for a larger blanket, so I think that's what's going to happen.  The alpaca-silk was wonderful to work with as a warp -- soft and strong -- so I'll get more of it for the other panels, but I think I'll get a light brown colour for more pattern contrast with all four of the weft yarns, and when I sew the panels together I'll alternate them white-brown-white-brown. 

The vagaries of photography turned this white fabric silver - ah well, at least the pattern shows up well!
So this is an unfinished tale -- I have two more panels in my blanket left to go.  That means it won't get done until I finish my current exciting project which I have yet to write about, and then some tea towels I have in mind that I'm looking forward to doing, then possibly a bath towel, and then a blanket for my son in natural grey handspun, then, hopefully, there will be time ...


9 Aug 2014

Weaving Blankets with Stash Yarns

I've been busy weaving blankets and towels these past months, mostly mostly working on one major project, a taste of which I present below.


Right now on my loom, luring me away from my desk to weave a bit more ...

But first things first.  This entry is about what I was weaving BEFORE I started what you see in that picture above.  I've been so taken up with my projects and life in general that I have been neglecting to share my experiences with the outside world.

I inherited my grandmother's counterbalance loom some years ago, a Fanny Leclerc.  I love this loom.  It is special to me because it was Grannie's and she was one pretty amazing person.  Sometimes when I'm weaving, I feel like I'm visiting with her.  I often wonder what she would think of what I'm getting up to.  I'm pretty sure she'd shake her head and laugh.

Much as I loved this loom, it is old enough not to have a shed regulator.  Even though it's possible to do many, many things on a counterbalance loom without one, I kept finding things I wanted to try that I couldn't, and it was always on my mind that if only I had a shed regulator it would be sooo perfect  and how will it be possible to survive without one ...  so this year I got an excellent birthday present ...


The shed regulator is added onto the top of the loom - all the lighter-coloured wood - to allow for an uneven shed, so instead of always raising combinations of two shafts, I can now raise just one or three.  A shame the wood colour doesn't match perfectly, but given that it's been added a good 50 years after the loom was bought, it's amazing that Leclerc has kept their specifications so perfectly that I can buy a new piece this way.  Also, the different colours remind me of my loom's history.

... and I am pleased. I can't figure out why it works, but then I don't really understand why or how my telephone works, either.  I just accept it and am thankful.

I was finding my yarn stash was becoming a little overwhelming, and I decided to weave some small blankets.  We don't overheat our house in the winter, and at night curling up in front of the TV it's nice to have a blanket to get cozy under.  I figured it would be a fun way to experiment with putting colours together and seeing how different yarns behaved on the loom.  

It's not the first time I've done this.  There's this throw blanket I made entirely from small skeinlets of leftovers.


The warp is mostly leftover Harrisville with a bit of other yarns thrown in.  It was so fun just randomly choosing my next stripe and weaving until I wanted to start something new.  It's not huge, just big enough for a 10-year-old to lie down under, and plenty large to wrap around a big person.


I also did an all-yellow experiment, a giant shawl made from taking out my box of yellow yarns and just following my heart.  I love yellow; it's always been one of my favourites.


Closeup of the shawl - I mixed fibres as well as yarn types.
Not woven too tight, so it has a nice drape.
It's much brighter in real life, I just can't capture it with our camera.

As I went through my stash looking for inspiration, I came upon several balls of lopi a friend of mine gave me from a Fair Isle sweater that she'd always intended to make but never did.  I'd never used lopi as a warp before, and was a bit leery that it would just break, given that it's spun with such a low twist.  It worked just fine (although there was a lot of lint on the floor under the loom by the time I was finished).  


There were two colours, navy blue and a dusty turquoise-green.  The challenge was designing a blanket that didn't need more warp than I had from the sweater yarn.  I alternated the colours in six-inch stripes, sett at 6 epi.  I love the difference in the weft colours as they move from one warp stripe to the next.  It totally changes what they look like.  Amongst the weft yarns you can see here are a few skeins of Noro yarn and some handspun.


The blanket was woven in two panels each 23 inches wide.  The centre of this photo shows the seam where I sewed them together to make the blanket.
I used a skip twill pattern because I wanted to show off the colours more than the actual patterning of the weaving.

After washing, the yarns really pulled together nicely into the blanket fabric.
It's really warm and solid but has a nice drape, so I think the sett of 6 epi worked out okay.

It's just the right size for laying down under on the couch.  I guess some sweaters were never meant to be.

I also had a whole lot of pinks in my stash, most of it Briggs & Little that I had picked up here and there.  They made the warp in my next project.
Different pinks of about the same weight.  I'm pretty sure that pink and grey yarn on the front right  is from my first tapestry weaving class when our instructor was teaching us to dye yarn.
For the weft I picked out several skeins of beautiful, soft yarns I'd gathered over the years. There's a lot of Misti Alpaca yarn of various sorts


as well as some gorgeous baby llama boucle handpainted by the Fleece Artist (top left), some lopi in a fabulous pink left from a sweater I made as a teenager (what ever happened to that, by the way?  I loved that sweater! I'm sure I lent it to one of my sisters....) and some handspun.  I couldn't wait to put all these colours together.  


I wove the blanket in two panels 32 inches wide in a skip twill, with a warp in random stripes of pink.  I changed weft colours at my whim.


Given that the whole point of this exercise was to use up stash yarn, I'm really happy with the colours.  If I were starting out fresh, I probably would have used something else for the warp - the colour I had the most of could have been better.  Still, it's a great blanket, very snuggly and just the right size for a single bed.  My daughter loves it.  

This photo shows the seam running up the middle of the blanket between the two panels.
One comment I would have is that I'd never used Misti Alpaca yarns before.  I bought those skeins because I saw them somewhere for a good price and couldn't resist the colours.  I have to say now that the blanket is in use, they pill and shed outrageously.  It's actually remarkable how much fibre that blanket loses from those yarns.  They make for super-softness, and they're lovely to hold and work with, but I don't think I'll use them on anything practical in the future.

Now time to get back to my loom and the current project I showed you at the top, which I've been working on a full year now ... that blog entry coming soon ...

21 Oct 2013

Using Art Yarn - the Fate of my Little Ones

Something I love about spinning is imagining what might be happening to my yarn after I send it out into the world.  Most of the time I never find out, and am left to ponder its fate -- was it made into a beloved garment?  Put away with the best of intentions and then forgotten about?  Discarded immediately with an embarrassed shrug?  I can't help wondering!  

Every now and then someone will send me a picture to share what they've done, though, and I can't exaggerate what a thrill that is. 

A year or two ago I was contacted by Mark Sloniker, an artist on Etsy, with a request for some supercoil yarn.  I love to make supercoil, although it's time-consuming.  It involves spinning a long, thin single, then plying it with another single or "core thread" by wrapping it pretty much at 90 degrees so as to encase the other single (like a core) with a long coil of yarn.  I discussed this process more, with illustrations, previously in my blog.


Example of supercoil yarn: I love the look and feel of these!

Mark had a particular project in mind -- a tree stump -- and asked for specific colours.  After getting his approval on the dye job I did on the wool -


Merino commercial top hand-painted with acid dyes

As the fibres are drafted apart for spinning, the colours fade and blend


I spun the yarn -


This totalled about 56 yards of supercoil yarn


Not long ago I heard back from Mark, who not only finished his truly gorgeous tree stump - as you can see below - 


You can read about how Mark made this fabulous piece on his blog
but used it as part of a set for illustrations to a children's book he has written, called Search for the Sugar Puff Hollow, available in his Etsy shop. 


 A pic from Mark's blog about the book -
love the critters, and hey, there's my yarn in the background!

There are tons of behind-the-scene photos of the making of this beautiful book on Mark's blog HERE.

So a totally exciting story of some yarn that has gone on to make me proud! I'm humbled by his amazing creativity.

In the meantime, I keep spinning...


I always try to keep a few skeins of supercoil in my Etsy shop...


7 Sept 2013

Corespun Yarn with Ribbon Rose Inclusions

One thing I like about corespun yarn is how easy it is to include small items like beads or flowers.


Today it's about flowers.  How decadent, to have these little beauties interspersed throughout your work, whatever your fibre art of choice happens to be.  Being in the mood for reds lately, I combed out a selection of red fleeces into some lovely top.  


So what's the story on this selection of top?  This past summer when I was down home in Nova Scotia I bought a lovely Romney x Lincoln Longwool fleece at Aspen Grove Farm outside Bridgewater. Very lustrous and curly.  I dyed it mostly in different reds and one fuchsia because, hey, how can you not dye something fuchsia?  It took the dye beautifully.  This skein includes all those reds and pinks from the Romney/Lincoln fleece, plus a bit of Corriedale.  So it won't be a soft and fluffy yarn, but it will be lustrous and textured.


Because I didn't want to blend all those lovely reds together (although in these photos they seem to look more pink than red - you'll just have to trust me on this) but wanted each colour to speak its own voice in some random fashion, I prepared my top for spinning by laying out a strip of each colour on my lap ... 


... and drafting it out into a long cord (strip? I'm not so great at the proper vocabulary, here) of top.  So there is some colour intermingling, and some striping of one colour after another.  

Next for the flowers to include in the yarn:


I buy these ribbon roses from Laurl on Etsy.  This small size fits easily through the orifice on my wheel and doesn't get caught in the hooks.  There are larger ribbon flowers available that can be fed through the orifice with lots of care and patience, and although I have at times in my life had sufficient emotional wherewithal to calmly, gently, and successfully ease large ribbon flowers through my wheel workings, this is not something I reliably have in vast quantities, nor do I want to spend it all on my yarn in case that means I'm going to have a complete meltdown later in the day when I burn supper or break my favourite mug.  We live our lives and do what works best, right?  For me, sticking to smaller, more easily dealt-with flowers is the road I have chosen.  My advice is, before starting a project like this, make sure whatever it is you're spinning into your yarn will fit through your orifice and hooks, and consider how willing you're going to be to nurse the yarn along if it's a close fit.


I spun a small sample skein just to see how the colours would play out with the whole hand-drafting the top together method, and also to help me pick what colour flowers I wanted to use.  I think any of these would be nice, but I wanted the flowers to stand out.


Here's my practice skein still on the wheel -- you can see drafting the top as I did worked just fine, and I have random sections of different reds all throughout my yarn ...


... and here are my rose colour choices.  Sadly, the light pink one didn't focus very well, but I think it will stand out best against the reds, and that's what I'm going with.


First step is to thread the roses onto a spool of strong nylon beading thread.  This thread will be strung alongside my strong cotton core in the yarn.


The roses are sewn together across the back, making an ideal spot to run the needle to thread the roses onto the nylon, i.e., between the "leaf" ribbon and the "blossom" ribbon, within the bounds of that stitch.  I took some fabulous shots of the pink flowers being strung onto the nylon.  What in the world happened to them?  I have no idea.  But they've completely disappeared so you're just going to have to use your imagination here.


Now I'm set up for spinning.  Next to me I have a bin with my cotton core (embroidery cotton #10), and another bin with my nylon beading thread.  My comments on this set-up are as follows:

1. You don't need to use two cores.  You can thread all the flowers onto the cotton core.  However, it's a thicker thread and not as slippery, so you have to take more care putting your roses on and sliding them along as you're spinning -- which is okay, I've done it successfully and it's not a terrible drag. It's just easier and smoother with nylon.

2. I thread all the flowers on at once, sliding them a few metres down the thread.  Then I spread out the first five or so flowers where I want them along the nylon.  They tend to stay where I want them, so it's a convenient way to keep track of how far apart they are in the yarn.  I've tried spacing all the flowers out at once, and wound up with a gigantic tangle of nylon in the bin, so just doing a half-dozen or so at a time seems to be the answer for me.  You can see in the photo above, one pink rose hanging on the nylon thread, making its way up towards the wheel to be spun into the yarn.

3. One of the best online tutorials for corespinning yarn that I have seen is by Esther Rodgers of Jazz Turtle.  This is a good video for showing how to start your corespun yarn and introduce the core threads to get going.

4.  Why do I use these ugly plastic bins?  I know.  They're not at all handmade or attractive or anything inspiring creativity.  Here's the thing.  Handmade baskets are tremendously beautiful.  I love them.  But they catch and pick at my materials as I'm spinning, which is not only frustrating but can cause damage.  There are lovely felted baskets which wouldn't do that, but the reality of my life is that I use almost exclusively handprocessed fleece in my yarns.  That means I'm doing a lot of combing and carding, and no matter how much vacuuming and sweeping I do in my craft room, there's always a film of VM (dried crumbs of plant matter) on my floor.  I don't want to even think about what that would do to a lovely felted basket.  Plus I need bins for tons of reasons, including holding uncombed (VM-laden) fleece.  And the ugly plastic ones wipe out easily, are stackable, and sturdy enough that they can hold that huge cone of embroidery cotton in the same place as it's rolling around.  So I forego the aesthetic qualities of more attractive baskets as worktools in this particular situation.


So here we are, corespinning along.  I've just lifted my thumb back to show how I keep the core threads stable in my hand by running them under my ring finger.  My pointer finger smooths the wool around the core as I'm spinning along.


When I get within a few inches of a rose, I stop spinning and slide the flower up the thread to meet the end point of my yarn.  Here I'm holding the two core threads (cotton and nylon) separate, just for the sake of the picture.  When I'm actually spinning, I hold them together.


Fit the rose right up against the wool, treadle once ... 


... which wraps the wool around the back of the flower ... 


... and spin on down the core.  Keep an eye on the rose as you continue to spin.  Hopefully it should feed easily through your orifice and onto your wheel, but depending on your wheel it may need a hand -- you'll know right away, because the yarn will stop feeding onto the bobbin.  Just stop spinning, ease the flower through, handwinding it onto the bobbin if necessary, and continue on your way.


Here's a photo of the final yarn, which, taken in my homemade lightbox, shows something much more RED than the pinkish colours above.  It really is these reds, and not those pinks, which teaches us all something about how unreliable cameras are for showing us what anything actually looks like.  Now that's deep.


See this yarn in my ETSY SHOP

Here are some other ribbon rose yarns I've spun - this first one corespun with uncarded locks dyed green, so there's lots of texture and curl.


Available in my ETSY SHOP


In my ETSY SHOP

 In my ETSY SHOP


This was the last skein I spun using larger flowers.  They do look marvellous, and maybe someday when I get my dream larger-orificed Country Spinner, I'll go back to including these flagrant beauties...